Lesson 1: TUNING
If your instrument isn't in tune anything you play will sound wonky so lets learn to tune your uke.
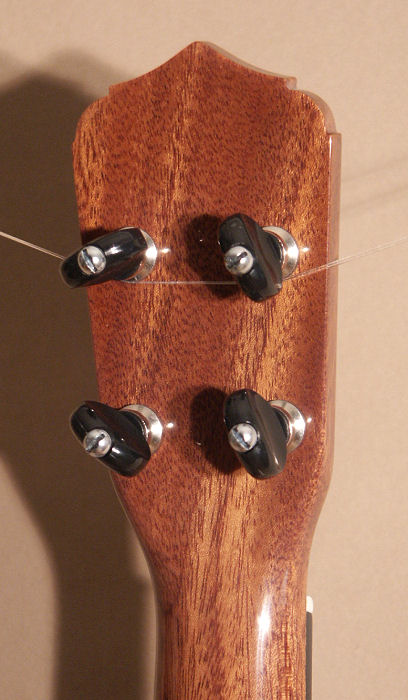
One thing you should know if you are new to playing the ukulele is that your strings, when new, are going to need some help staying in tune. Expect that it might take a few weeks with lots of playing and plucking to stretch those strings enough so that they hold their own. You also may want to check your pegs to see if they have the ability to be tightened. Most likely they will have a screw on the back like either of these..
| Sometimes when a uke is new the pegs can be lose. It's helpful to tighten them so that the strings retain their tune once they have been worked in. Be careful that you don't over tighten them. When I first started out I used an online tuner then I decided to purchase one to carry with me since I am not always able to get on to the PC when I need to tune so after trying out a few different ones I settled on the simplicity and accuracy of a red clip on SNARK which I found on AMAZON.COM for under $10. I love it.. It has a vibration mode so that I can tune my uke regardless of the noise in the room. Which is a frequent occurrence with me. Some of the features of the SNARK beyond the cool colors and bright screen are the tap tempo metronome, pitch calibration, and transpose feature. |

If you have a good ear for sound then an online tuner is probably all you need to get your uke to where it needs to be. Here is a great website for online tuners http://www.get-tuned.com/ukulele_tuning_methods.php there is also instruction on how to restring your uke. Thankfully I haven't needed to do that yet. Here is another great tuner http://www.ukuleletricks.com/ukulele-tuner/ I've also seen aps that you can download too. Here is a free one from APPSHOPPER.COM http://appshopper.com/utilities/ukulele-tuner (I'm quite unfamiliar with phone aps so you are on your own here - use at your own discretion) Once your uke is in tune there are a few helpful things to know.... |
_________________________________________________________________________________________________________________________
Lesson 2: Knowing Your Instrument
The Anatomy of the Ukulele: http://www.ukulelestrummers.com/Nomenclature.html I couldn't have said it better myself!
_________________________________________________________________________________________________________________________
Lesson 3: Strings
The strings are counted from bottom to top. They are one of the most important contributing factors where the overall quality of the sound is concerned. Unlike a guitar the fattest string on a uke is not the top string but the 3rd string up from the bottom. There are a lot of brands out there and if you do some research you will learn that there is quite a bit of debate over who which is the better quality. The Koolau and Martin brands are both popular with professionals while Aquila and Worth seem to be winning the war among the every day player. What ever you do, make sure you choose the correct sizing for your instrument. Meaning don't pick soprano strings for your tenor uke or you will end up quite disappointed. You might find strings on the cheap and while we all want to save some bucks, your string selection is not where you want to do it. Do yourself a favor and spend the extra few bucks to invest in some higher-end strings for your uke. You'll be glad you did.
I mentioned it above but it seems more appropriate to include in lesson 3... HOW TO RESTRING YOUR UKE. This is as much of a lesson for me as it is for you since I have not as of yet had the need to learn this. Click on one of the following links for step by step instructions: http://www.get-tuned.com/restring_ukulele.php or http://ukulelestore.blogspot.com/p/flea-fluke-new.html if its still not clear then watch this video
_________________________________________________________________________________________________________________________
Lesson 4: Notes on the Fret Board
In lesson 2 (if you clicked the link) you learned about the different parts of your ukulele. The fretboard is like what you would find on a guitar or an electric bass. Ukulele fretboards are spaced so that each fret higher up the neck represents a half-step climb in pitch from the last. This allows any string to sound a chromatic scale between the open stringand the 12th fret. This site gives an EXCELLENT explanation of the fret board and how the notes lay out http://www.kauairainbow.com/Ukulele/Fretboard/fretboard.html Keep in mind to play a note & strum a chord are not the same. Chords are strummed and notes are picked. Your strings top (closest to your chin) to bottom (closest to your waist) are Good Cooks Eat Always. On a ukulele with standard tuning (G C E A) the notes on the ukulele fretboard are located as follow :

(borrowed from http://liveukulele.com/lessons/learning-the-notes-and-the-fingerboard/ )
There are 12 notes in an octave. An octave is the distance from one note to the next highest note of the same name (you pass all 12 notes to get to the next note in the next octave). A piano is the easiest way to see this because it is all laid out in a repeating fashion (each time the pattern of keys repeats, you are in a new octave) There are 7 natural notes:
- A B C D E F G
They are considered natural because they are not altered with sharps or flats. A sharp (pound sign in musical notation – #) raises the pitch of the note a half step. A flat (squashed lower-case “b” in musical notation) lowers the pitch of the note a half step. A half step is one fret on the ‘ukulele. To get from 7 natural notes to 12 total notes, some in-betweens have to be added.
These are called “enharmonics”and each has two names. There are 5 enharmonics:
- A# C# D# F# G#
…or the second name would be (same pitch, just a different name):
- Bb Db Eb Gb Ab
So an enharmonic is just one of the 7 natural notes altered with a sharp or flat (raised or lowered one half step – or fret). You can look at enharmonics from either side – as a sharp or as a flat. Usually in a piece of music only one of the two will be used.
All together, natural notes and enharmonics mingling, your 12 notes are:
- A A#/Bb B C C#/Db D D#/Eb E F F#/Gb G G#/ Ab
_________________________________________________________________________________________________________________________
Lesson 5: CHORDS
Learning ‘ukulele chords is most easily done with ‘ukulele chord charts. So here you go...
If you hold your Uke out in front of you with the strings facing your chest you may notice the similarities between the chord chart and your Uke neck. Each chord diagram on the chart represents your finger placement on the string and fret of the neck. You should be pressing down on the tip of your finger on the string as close to the center of the fret as possible. It is helpful it you try and keep your thumb centered on the back of the neck for support. If your thumb is too far over and close to the side of the G string you may find that playing certain chords is difficult because your hand is not properly positioned.
 |  |
_________________________________________________________________________________________________________________________
Lesson 6: Strumming
http://www.ezfolk.com/uke/Tutorials/Strumming/strumming.html - This is my favorite site for learning the different strum patterns because it provides sheet music, videos and sound files for you to practice with
http://www.ukeschool.com/ukulele/lessons/how_to_strum.html - very basic strum patterns for beginners one lesson at a time. The site offers midi files to strum along with
http://ukulelehunt.com/2008/10/22/ukulele-strumming/ - teaches hand positioning, where to strum, techniques, and various patterns like Chunking, Dead Strums, Swing and Shuffle etc...
http://uketalk.com/playingtips.html - Great information to help you improve your playing
http://www.ukemaker.com/ukeclub/media/StrumPatterns.pdf - A PDF download of strum patterns for you to practice
_________________________________________________________________________________________________________________________
Lesson 7: Reading Music
http://www.ehow.com/way_5796411_do-read-ukulele-music_.html - A great E-How article to get you started.
http://www.ukuleleintheclassroom.com/resources_C6.htm - tools to help you learn to memorize chords and read music
_________________________________________________________________________________________________________________________
You might want to turn the volume down for this one. Haha.... Here I am after 5 weeks and about 6 total hours of practice. I've improved some since then :-) |
